|
The [Output] option (Figure 1) in Process/Print Setup of Job Editor allows you to control how jobs are processed.
The [Output] option (Figure 2) in the Advanced Quick Set Options controls how jobs are processed.
To use the Output option:
(Process/Print Setup)
-
In Job Editor, go to Print tab > Print Setup > Output or click the Print Setup icon that is on the right side on the toolbar.
- Select the Output options you want to use (Figure 1).
(Advanced Quick Set)
-
In RIP-Queue, click Edit Quick Sets icon on the toolbar or go to Configure Printer > Quick Sets tab and select [New] or [Edit] button. Click Edit > Advanced > and select [Output] from the tree (Figure 2).
- Select the Output options you want to use.
You can use any of the following [Output] options:
 Output Output
The [Output] option determines the type of image output that RIP-Queue will process.
- Color - This is the default output option. Using this option will generate color output.
- Grayscale - This option creates a black and white version of your job. Because this output method only uses the black (K) channel of the printer, lighter areas may appear speckled. To prevent this, convert the original image to grayscale using a photo editor, and then print the image using the Color output in RIP-Queue.
- Separations - This option creates a black and white representation of each color channel in your printer.
Image
This option allows you to print a mirror-image of the original image file and control the number of copies that will be printed as well as reverse your image.
- Number of Copies - This option determines how many copies will be made of the job. To allow the number of copies to be specified by the PostScript file, set this option to [Auto].
- Reflect at Print Time
- This option prints the job as a mirror-image of the original image file. This option is typically used when printing on backlit media.
Processing Options
The [Processing] option
determines how images are processed.
- Rip and Print on the fly
-
This option processes the image while the data is being sent to the printer. If this option is not checked, the entire image is processed first and then sent to the printer. The [Print Jobs Individually] Placement Strategy should be used when using this option.
- Process with interpolation
- This option softens jagged edges of low-resolution images. Although this option will not adversely affect high-resolution images, it does significantly increase the processing time.
- Process to allow rotation during print stage - This option automatically rotates images for a job to create the best fit to save media.
- Calculate Ink Usage - This option calculates the amount of ink that is used for a job.
- Bit Depth - Depending on your needs you can select the processing method you would like to use. In most situations 8-bit processing provides good results, however, 16-bit processing gives noticeable improvement in large images with a gradient in one color over a large area. Please note that 16-bit processing does slow processing down considerably. For more information see 16-bit Processing.
Rotate Option
This option allows you to set the rotation of the job before you print it. Select the degree rotation you want to apply the job. The job will be rotated the number of degrees clockwise.
|
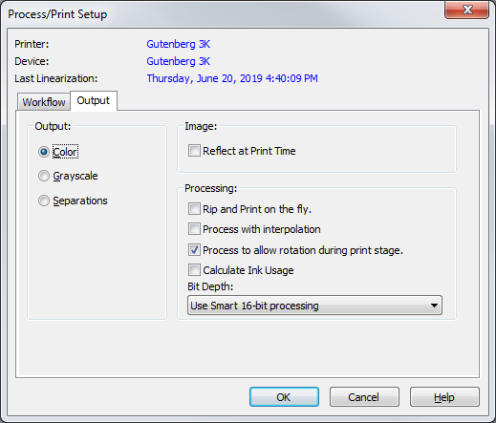
Figure 1
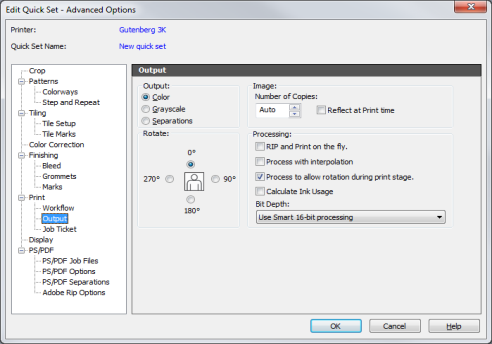
Figure 2
|